December 31, 2011

Easy Tamales

I decided to end the year with tamales.  In our family it's not Christmas without them.  My daughter talked me into making them for New Year's Eve.  If you have had tamales before, you know that its a lot of hard work just for one person let alone an army to make.  But I was able to cut down on time and make them without all the hassle.  Let's start with what you need.  Every town has a little grocery store that sells tamale masa already prepared.  The store I went to had the masa out in the bakery section pre-packaged.  They make there masa fresh each day.  I purchased 7 pounds ready made masa that all you had to do was spread.  You also have to make sure to pick up hojas translation (corn husks).  When I pick mine out at the store I look for big and clean.  Because you need to wash and soak them and you want to make sure there big enough to fold easy.  As for fillings this year I made meat, chicken with potato/carrots and cheese ones.  For the chili sauce I have a great recipe that I am posting below.

First things first make sure to have everything ready before you start a spreading.  I like to clean and soak my corn husks for about an hour while I am preparing the meat and sauce.  As for the short cut I bought a roast chicken at the grocery store.  Yes it cuts time on cooking the chicken and shredding it.  I also cooked a chuck roast for the meat with garlic, pepper, salt and a few bay leaves for a few hours, until the meat was falling apart.  I cut up same potatoes and carrots to add to the chicken tamales.  This is what you will need for the sauce:

6 Tbsp. cooking oil
1/2 cup of flour
2 Tbsp. California chili powder
2 Tbsp. New Mexico chili powder
4 cups of Chicken broth
salt, pepper, & garlic salt for taste.

Heat the 6 Tbsp. of oil over medium heat, when its hot add the flour a little at a time mixing it with a wire whisk or fork to make smooth.  You only need to brown it not over cook the two.  Before you start you want to mix the 4 cups of chicken broth warmed up with the chili powders so it is combined like liquid.  Pour the chicken broth and chili powder into the flour mixture a little at a time and whisk as you go so you don't get lumpy sauce.  Once it is all together add the salt, pepper and garlic salt and let seamier together until bubbly then turn off.  I like to add a little of the sauce to the masa after it has cooled to give it taste.  Make sure to add your chicken or beef to the sauce.


Dry the corn husk completely before spreading the masa on them.  You want to use the smooth side up for spreading.  I like to use a knife instead of a spoon I find it easier.  As you can see above evenly coat the corn husk.
Time to fill in the center with what you want.  Chicken and sauce is what I was doing for these ones.  Not to much or your tamales will over flow when cooking and not stay together.  I say about a spoonful in the middle center part is good.
It's folding time, one side first and then the other side. 
Last part is to fold the tail end up.  Just a hint before cooking that my mother taught me to put them in the freezer on a cookie sheet for about 15 minutes to help bind them together for cooking.

I know that most of us might not have a tamale pot handy, but that's okay.  I use a spaghetti pot, that I line the bottom with extra wet corn husk that I did not use.  place a soup bowl that is made out of glass upside down in the center of the pot.  Fill the pot with about two cups of water and while you are cooking you will want to add more water if it evaporates.  Stack the tamales in a circle around the bowl until they are standing up in a tight circle. Place a clean wet dish towel or rag over the top of the tamales and cover with a lid.  Start off cooking them on medium high until you hear the water boil, then place the setting to low.  Normally tamales can take up to 1 1/2 hrs to 2 hrs depending on how many you have in the pot.  While cooking check on them about every 30 minutes to make sure the water is not low.  Once you get close to 1 1/2 hrs take one out of the pot and place on a plate to see if they are cooked or need more cooking.  How you know if they are cooked the masa will not look wet.  Once they are cooked you will want them to cool down for storing.  You can store them by placing into Ziploc baggies.  You can keep them in the refrigerator up to 4 days or place in the freezer which will last you for months.  Either way you can enjoy these great tamales.

December 16, 2011

Sugar Cookies & More!

Tis the Season to get baking!  I like to say during the month of December.  Christmas cookies are my favorite thing to make this time of the year plus special goodies to give to friends.  As you can see I have started, my goal each year is to make 12 different type of cookies.  Because I bake that much I make some from scratch and others right out of the Betty Crocker package.  Yes I am not afraid to say it.  Because I add a personal touch when I do. 

As you can see sugar cookies & gingerbread was on my list.  I made these cute cookies for my daughters class Christmas party.

Yes, these little darlings came out of a sugar cookie package and gingerbread package.  Follow the recipe on the package but to make the dough more stiff, add only 1/3 cup of butter instead of 1/2 cup and add two table spoon of flour to the mix.
I used all sorts of difference cookie cutters for an assortment of shapes and sizes.  For decorating I used royal icing, food color and sprinkles for the job.  I suggest when you frost you will want to make the royal icing thick.  By doing that you need to use less water then it states on the package and if you are doing more then one color on a cookie let the first coat dry first before adding a second color.  Sprinkles need to be applied right away or the frosting will start setting and they won't stick.

If you are not much of a decorating person you can do these simple gingerbread faces.  M&M's for the eyes and red ones for the cheeks.  Royal icing for the glue and the smile.  As I continue on my cookie journey this week I will be posting more cookie idea and recipes.

Still not sure what to get friends and co-workers for Christmas?  This is one of my simple gifts this year a tumbler cup.  They have become the fade in the last few years.  I came across some cute ones the other day for only $3.99.  I just added tissue to the bottom with chocolates on the type and curling ribbon inside for color.  On the outside I used ribbon and made a homemade tag out of note paper and Christmas tags that I found in the dollar section at a retailer store.


The second gift idea was a cute Let it snow cup that I found for $2.99, seasonal sugar plum tea for $2.49 and rock candy sticks for .99 cent each.  I also throw in a snowman note pad & pen that I found for $1.00.  Tied it all together to create a sweet tea dream set.  Remember you can do this for coffee lovers to or hot chocolate.  I always put thought into what I give a co-worker, teacher, or friend.  It's always a good idea to keep in mind what a person likes to drink or what goodies they like to make it special. 
 

December 05, 2011

Christmas Tree Crafts

As we head into the second week of December.  I have to remind myself that time is a ticking when it comes to decorating the house.  I wanted to add a few new pieces to the red theme that I have been going through for the last three years.  To my collection I came up with a new card holder and Christmas tree mantel center piece.   Let's get started with the Christmas tree center piece.

Above are the following items I pick up in the dollar section at a retail store.  You will need dowels, bucket, ribbon, ornaments, and a glue gun for this project.

I started by gluing a dowel to the the back of a Christmas tree yarn ornament.  Once it was in place I glued on ribbon to the tree for extra color.  After that I glued the finished piece into the center of the pale.  Adding tissue paper to the bottom to hold it in place and put silver ornament balls on top.  This project took less them 30 mins.  This is what the finish center piece looked like once put together.


Now for the next project I used the following items that I also picked up in the dollar section.


Only a few things needed for this Christmas tree picture/card holder.  Foam trees, magnetic clips, ribbon, glitter, jewels and glue gun.  First you want to glue together all the trees on a long piece of ribbon.  Besides placing ribbon and jewels on the trees I wanted my tree picture/card holder to have the word peace spelled out.  I used glue to write each letter and gold glitter over it.  I then placed on all ribbons and jewels for a festive look and last but not least added the magnetic clips on the back with a glue gun.  Make sure to hide the clips so no one can see them.  You also would like to attach a ribbon in a loop on the back to hold or pin on to the fireplace, wall or door for hanging.  This is what it looks like after it is completed.


Check back this week, I will be adding more crafts, baking gift ideas and just plan family fun.  Yes Christmas cookies galore too.

December 04, 2011

Working The Gingerbread House Kits!

There are all types of house kits you can get to make gingerbread houses.  My choice is to wait until they go on sale the day after Christmas for 50% off.  I like to start by saying you don't eat the house so it doesn't hurt to keep them stored.  The only thing that might not be good is the candy and icing.  With that in mind you can purchase royal icing at your local cake supply store and buy cheap candy like mints, tootsie rolls, jellybeans, M&M's or whatever catches your eye.  The following houses are previous gingerbread houses made over the years.  It is a family tradition that I like to do with my daughter each year.


The house on top was the first attempt me and my daughter made in 2006.  It was a family effort my in-laws and us made it on Christmas Eve as a fun project for the kids.


As you can see my daughter was not to happy in 2007, the gingerbread house decided it wanted to cave in.  I have a secret to keeping them together now.  I glue gun the house together before placing the royal icing on to make sure it stays in place.


This house in 2008 came cracked up, so I had to do my best to repair it.  That year we throw in a couple of Christmas trees by using green royal icing, sugar cones and sprinkles.
In 2009 we tried our hand at two houses.


Also that year I made a replica of my sisters work out of graham crackers, chocolate wafers, royal icing and candy.  I used a card board base to glue the graham crackers to.  Just to let you know you can use graham crackers for smaller ones too.  Use a milk cart base for the outline of your house.

I have to say that in 2010, I think this house was the best yet.  We even added coconut for snow and a jelly snowman at the door with smarties candy for the walk way.


This years 2011 house is up and running we are going with a red and green theme this year as you can see.  I was very proud of my daugther's candy design.  


So if you are not the baking type, but would love to make a gingerbread house go out and purchase a kit and use your imagination to bring it to life.  This is one project that I enjoy each year and by looking back at the pictures I can see we have improved.  Now if I can only master a two story gingy house.

Keep following because I have great Christmas projects and some Christmas cookie baking you don't want to miss.  Until next time keep it simple!

December 01, 2011

Heart Felt Christmas Gift Ideas

There is only 25 days left until Christmas Eve!  If you haven't started shopping yet you might want to think of a meaningful gift to give.  Believe it or not when you put thought into a gift that comes from the heart.  They become the best gifts without much cost to your wallet.


A few years ago I made a special video of past Christmas pictures combine with music for my mom and dad.  I also added a calendar with pictures of all our family members in the month of their birthday for them.

Another year I made my mom a photograph scrapbook on line of all of her grandchildren and great grand children.  It came with a hard cover and captures on each page, just like a story book.  Of course it brought tears to her eyes.

 When shopping for small gifts for family members or friends you can always find bargains and great ideas if you think ahead of time.

I like to give nice hand soaps from one of my favorite stores that sales body stuff.  This time of year they have great sales like 4 for $10.  I wrap each bottle in a cute Christmas bag or even colorful tissue paper with a nice ribbon & tag.

The dollar stores have great packing for small items and sometimes you can find cute items to give away for co-workers.  I like to shop for ornaments that I can write on like name and year.  To make it special add candy and homemade cookies.

You can even come up with a new tradition.  Each year I buy my mother-in-law a new Christmas bell to go with her gift.  I have been doing this for over 12 years.  Note she likes to collect small figure items and bells.
For my daughter we buy a new ornament every year together.  This year we already picked one up at a craft show that was way to cute.

Rule of thumb if your not sure don't buy it.  Make this years shopping experience more about the thought. 

Coming up this week:
Gingerbread houses


November 17, 2011

Pumpkin Spice With Cream Cheese Muffins

This week I had a craving for one of my favorite muffins that I usually pick up at a coffee shop in my area.  But I thought to myself why not try a go at making those delicious muffins myself.  As I say let the experiment begin!

Not sure on what ingredients I wanted to use.  I had to think for a moment about it and this is what I came up with.  Just to let you know I like to mix and match recipes that I used in the past from other desserts.

Recipe

Muffin mixture

1 box of spice cake mix
1 cup of water
1/3 cup of oil
3 eggs
1 can of pure pumpkin 15oz

Cream Cheese Filling

1 pkg of 8oz cream cheese (soften at room temp.)
1/4 cup of sugar
1 egg
1/2 cup of condense milk

Make sure to heat oven to 350 before you get started so it has time to warm up and line a muffin pan with cupcake liners or not its your choice.  This recipe will yield 24 muffins.

Let start by making the muffin mixture first:

Combine cake mix, water, oil, and eggs.  Blend together with a hand mixer on medium speed until the batter is smooth.  Next step is to add the pumpkin.  I suggest folding it in by a hand spatula not the hand mixer so the batter can stay fluffy.  Set aside until your ready to fill the muffin pans.

In a separate bowl combine cream cheese and sugar blend together, once whipped together add egg and condense milk.  It will look runny but don't worry it will work.

Now its time for the magic:

Fill muffin pans with batter, like you would cupcakes.  After that is down it time to add the cream cheese filling.  This is the tricky part to the recipe.  I used a table spoon measure to help with this part.  Scoop a table spoon of the cream filling and insert into the center of the muffin like you are pushing down and release.  Repeat one more time so you get a good portion of the cream filling in the center.  

It's time to bake:

Place muffins in the oven at 350 bake for 20-25 minutes.  Depending on your oven they might bake faster or slower.  For me that would be slower since I have a 1950 wall oven.   

The end result was these moist yummy muffins.

*Just know that you can use nonfat, low fat, or substitute sugar for those that have dietary restrictions.


Still trying to come up with an idea for the teacher!

Each year I like to give my daughters teacher a simple gift for fall.  I hit up the dollar stores or stores that have dollar sections and look for fall items.

I keep it simple by purchasing items like fall leafs for decorating, note pads that are orange or fall print, an item that can sit on her desk like a small pumpkin.  I also purchase an orange pail to place these items in and bake cookies which only add up to a few dollars.  I like doing this to let the teacher know that we appreciate what she does.


October 30, 2011

Chocolate Cupcakes, Rice Krispies Pumpkin Treats & Cake Brownies! Oh My!

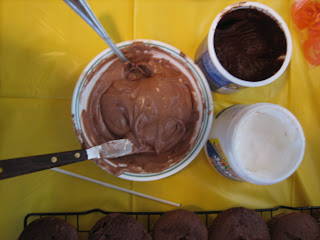
As I promised this is a follow up to last weeks baking quest.  As the fall festival arrived for school last week.  I always volunteer for cupcake duty.  This time I wanted to do something different, so I decided to put chocolate creme filling in the middle for an extra surprise!

Having to get started first was to bake two dozen of cupcakes.  Which was the easy part since you only have to use a of box of cake mix.  Once cupcakes are baked and cooled you will want to place a hole in the middle.  You can use a round popsicle stick or skewer in a circular motion to create a well in the center.
For the filling you will want to mix together one cup of chocolate frosting and one cup of marshmallow puff.  Place the mixture in a plastic ziploc bag or icing bag.  At the end of the bag cut a slit opening, not to big.  Stick the tip in the middle of the cupcake and squeeze until the filling comes out the top.

As you can see to the right the cupcakes filled to the top.  After that I just frosted and covered them with sprinkles and candy corns.  You can see the finish product below.  Just a note you can use any type of filling when doing this. 
The second project I worked on this weekend, was rice krispies pumpkins.
Here's how to get started, you will need to make rice krispies or buy them made already either one will work just fine.
 One tip if making you always want to make sure to butter up your hands to form the treats without sticking to your hands.  I shaped the mixture into round balls and placed them on sticks.  After I was finished I placed them in the freezer for about 10 minutes.  Why the freezer you ask, because the next step is dipping them in colored chocolate.  It's easier for the chocolate to stick and the treat to stay firm and not fall apart.  Please note you still will have a few rice krispie treats fall apart no matter what.  Don't be discouraged when you try it.

Melt chocolate as directed, I like to use my chocolate melting pot that I purchased from the store, which saves a lot of time.  You will also want to set up glass cups or sundae cups I like to use to hold the pops after you are done dipping in the chocolate.  It helps them to dry smooth all the way around. 
  Once they dried I was able to do my second step that was adding the stem on top.  Which was a tiny marshallow that was dipped in green chocolate by using toothpicks to dip and place them on top. 
This project does take time and patience, but they do come out cute.  In the back ground you can see ones I just drizzled with chocolate.  I like to try different types when I am experimenting.  Now all I have to do is wrap them up and give them out.

The last baking item of the night was my famous cake brownies.  I like to make these when I am going to a potluck or school event.  The reason for this is they are fast and easy, plus they taste so good. 
This is what you will need to make them:  One box of chocolate cake mix, one 4oz box of instant chocolate pudding, 2 cups of milk and a bag of chocolate chips.
First mix together instant pudding and milk only to dissolve the mix not to make it pudding like.  Second add in the cake mix.  Mix until everything is smooth and then fold in the chocolate chips.  Here's the tricky part place on a cookie sheet that is 13x9.  I like to place wax paper down first and spray it with cooking spray to help smooth out the mixture.  It may not look like enough but it is.  Believe me you just have to work on spreading it with a spatula.  Because once they start cooking they will rise and spread like a cake.  They should look this before they are placed in the oven at 350 for 20-25 minutes.

Once they are finish baking let them cool for about 15 minutes before cutting.  I also like to add a special touch by adding drizzled melted dark chocolate and white chocolate to give it an extra sweet bite.  This recipe makes about 40 brownies.  Here is what they look like when they are done.

I will follow up next this coming week with a gift idea for your teacher for November.  Until then try out some of these goodies.

October 24, 2011

Fall Treats

Fall has arrived people and its time to break out the oven mitts!  This is one of my favorite times of the year that I don't mind baking tell my fingers fall off.  I enjoy bringing a smile to children and adults with the goodies I make.  With Halloween around the corner my sister and I thought it would be nice to get together to make candy apples and sugar cookies.  What I didn't know was that I would be baking an apple pie too.


So off I went in search of the perfect apples.  I always like using granny smith apples because of there tarty taste.  Macintosh apples are just as good, so I purchased both kinds in large and medium.  I like to have a variety of different apple sizes on hand.  This year I decided to try caramel wraps that are ready to just fold over the apples straight from the package.  But I still bought two bags of my trusty caramel squares just in case.  My sister picked up chocolate melts, candy sprinkles and nuts for the outside of the apples.


As you can see I ended up using my two bags of caramels, I just wasn't feeling those caramel wraps.  Just don't get me wrong they just did not cover the apples the way I like them to.  Just a little hint because in the past I had a problem with caramel sauce being to runny.  I decided not to add water to the mix this year.  I just melted them in the microwave for 2 mins.  But do note you will need more bags of caramel if you are doing more then 5 apples.  The sauce becomes thicker and sticks to the apples really good without adding the water.  Make sure to use parchment paper with non-stick spray to place your apples on.  My sister had to laugh at me because the apples were sticking to parchment paper because I forgot the spray. I also suggest buying the round wooden sticks for the apples.  They go in much easier then the flat ones. 
 

The next thing on our to due list was sugar cookies.  My sister is going to hate me for telling you this but I used the bag mix.  Hey don't judge its easier then having to mix all kinds of ingredients together.  I only do it when I am in a hurry aka (lazy).  They come out just as good plus I make up for it with the decorating I do.  For frosting I use royal icing that does wonders for cut out sugar cookies.  For color I use food coloring or cake gels.  I like to make sure that my icing is thick. Don't add to much water to the royal icing mix, which can be found at any cake supply shop.  As mention before I love my Standlee's on Third Avenue, in Chula Vista. 


Finally the apple pie we used 6 granny smith apples slice thinly without the skin.  For crust we bought refrigerated pie crust from the supermarket.  Like I said this was an extra, no time for homemade crust.  In a bowl I combined one cup of sugar, 1/2 tbsp. of Cinnamon, a table spoon of flour, and a pinch of salt.  You can add a dash of lemon juice so the apples don't get brown.  Mix all together and place in pie pan with crust already lined at the bottom.  Slice small pieces of butter before topping with other pie crust.  You can choice to put a whole crust on top with cuts or criss cross dough on top.  Place foil around edges so they don't get burned.  Remove foil before the final 15 mins of baking to get brown.  I also added melt butter at that point and sprinkled with extra cinnamon and sugar.  It takes about 30-40 mins to bake with the oven at 350.  It came out yummy.      
As I forgot to mention about the candy apples once the caramel has set a little bit, you can melt the chocolate to drizzle over or add nuts and sprinkles.  We used cupcake liners on the bottom to protect the bag from access caramel.  Which is the final product below.  As I say keep it sweet & simple for a great outcome.  I will be back at the end of the week with fall festival cupcakes & a teachers fall gift idea.