
As I promised this is a follow up to last weeks baking quest. As the fall festival arrived for school last week. I always volunteer for cupcake duty. This time I wanted to do something different, so I decided to put chocolate creme filling in the middle for an extra surprise!

Having to get started first was to bake two dozen of cupcakes. Which was the easy part since you only have to use a of box of cake mix. Once cupcakes are baked and cooled you will want to place a hole in the middle. You can use a round popsicle stick or skewer in a circular motion to create a well in the center.
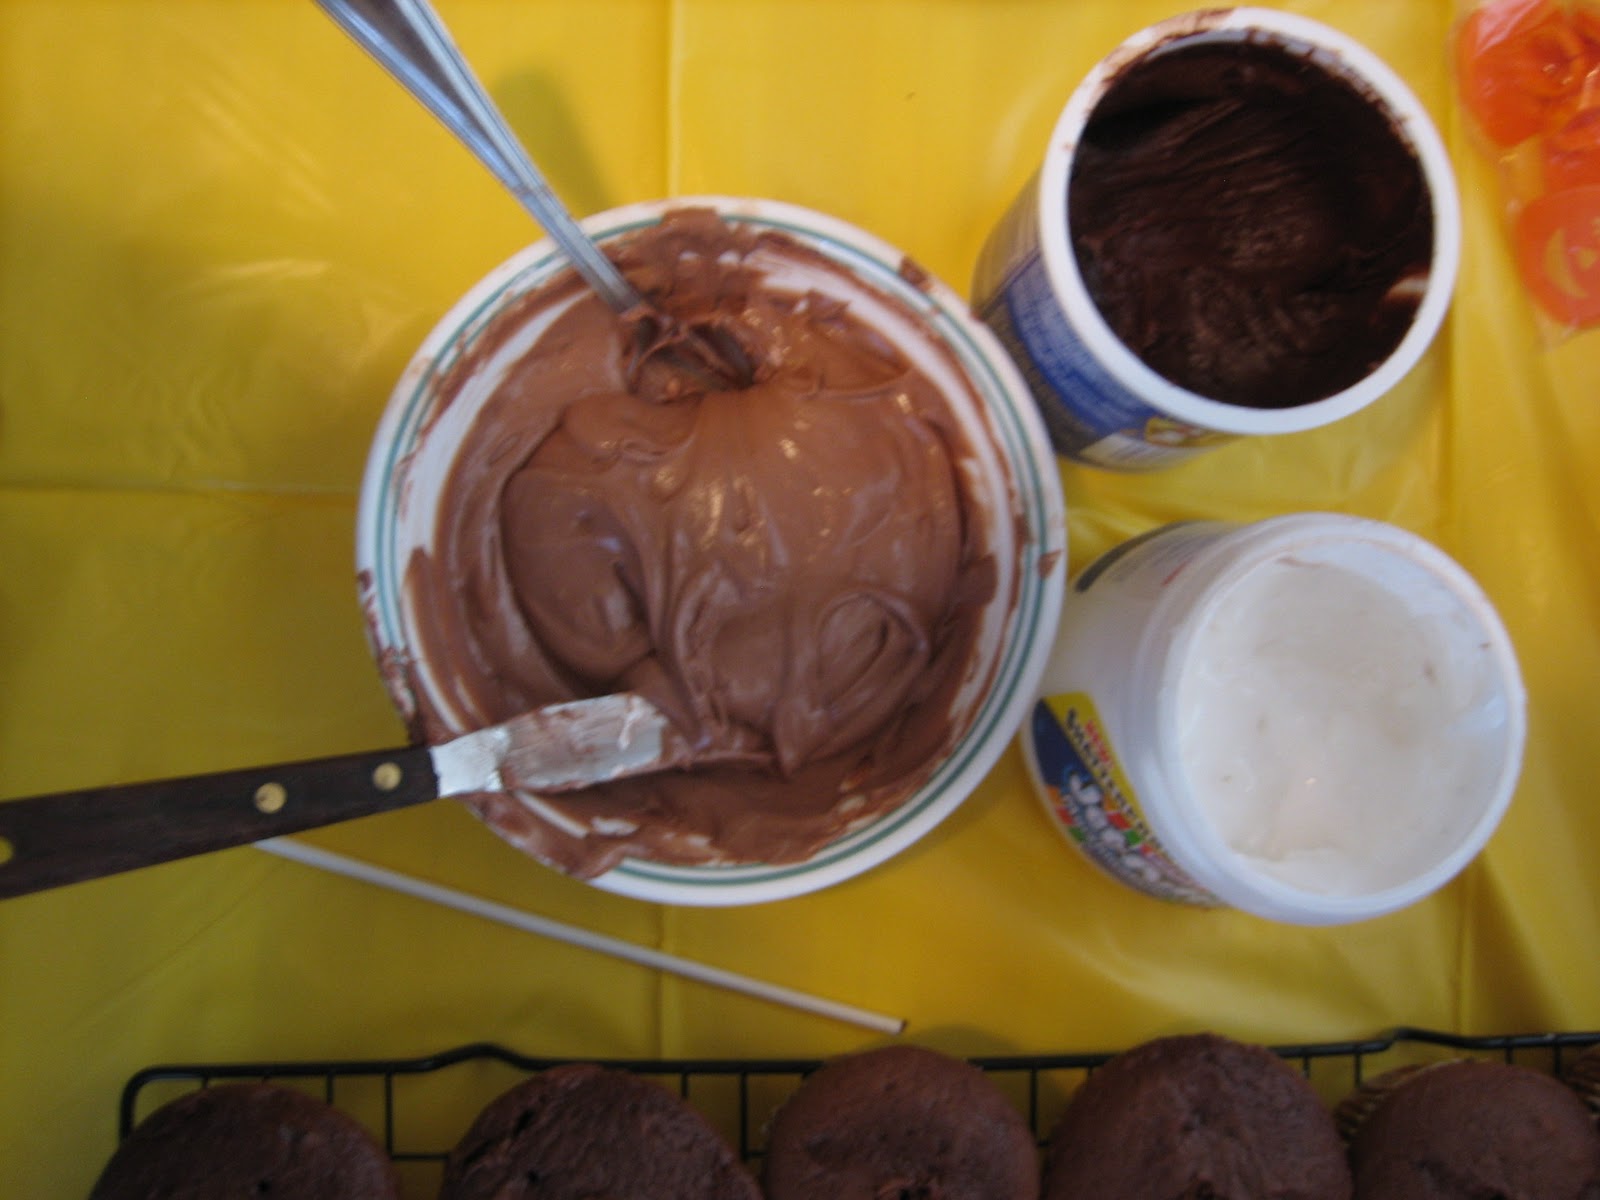
For the filling you will want to mix together one cup of chocolate frosting and one cup of marshmallow puff. Place the mixture in a plastic ziploc bag or icing bag. At the end of the bag cut a slit opening, not to big. Stick the tip in the middle of the cupcake and squeeze until the filling comes out the top.

 As you can see to the right the cupcakes filled to the top. After that I just frosted and covered them with sprinkles and candy corns. You can see the finish product below. Just a note you can use any type of filling when doing this.
The second project I worked on this weekend, was rice krispies pumpkins.
Here's how to get started, you will need to make rice krispies or buy them made already either one will work just fine.

One tip if making you always want to make sure to butter up your hands to form the treats without sticking to your hands. I shaped the mixture into round balls and placed them on sticks. After I was finished I placed them in the freezer for about 10 minutes. Why the freezer you ask, because the next step is dipping them in colored chocolate. It's easier for the chocolate to stick and the treat to stay firm and not fall apart. Please note you still will have a few rice krispie treats fall apart no matter what. Don't be discouraged when you try it.

Melt chocolate as directed, I like to use my chocolate melting pot that I purchased from the store, which saves a lot of time. You will also want to set up glass cups or sundae cups I like to use to hold the pops after you are done dipping in the chocolate. It helps them to dry smooth all the way around. 
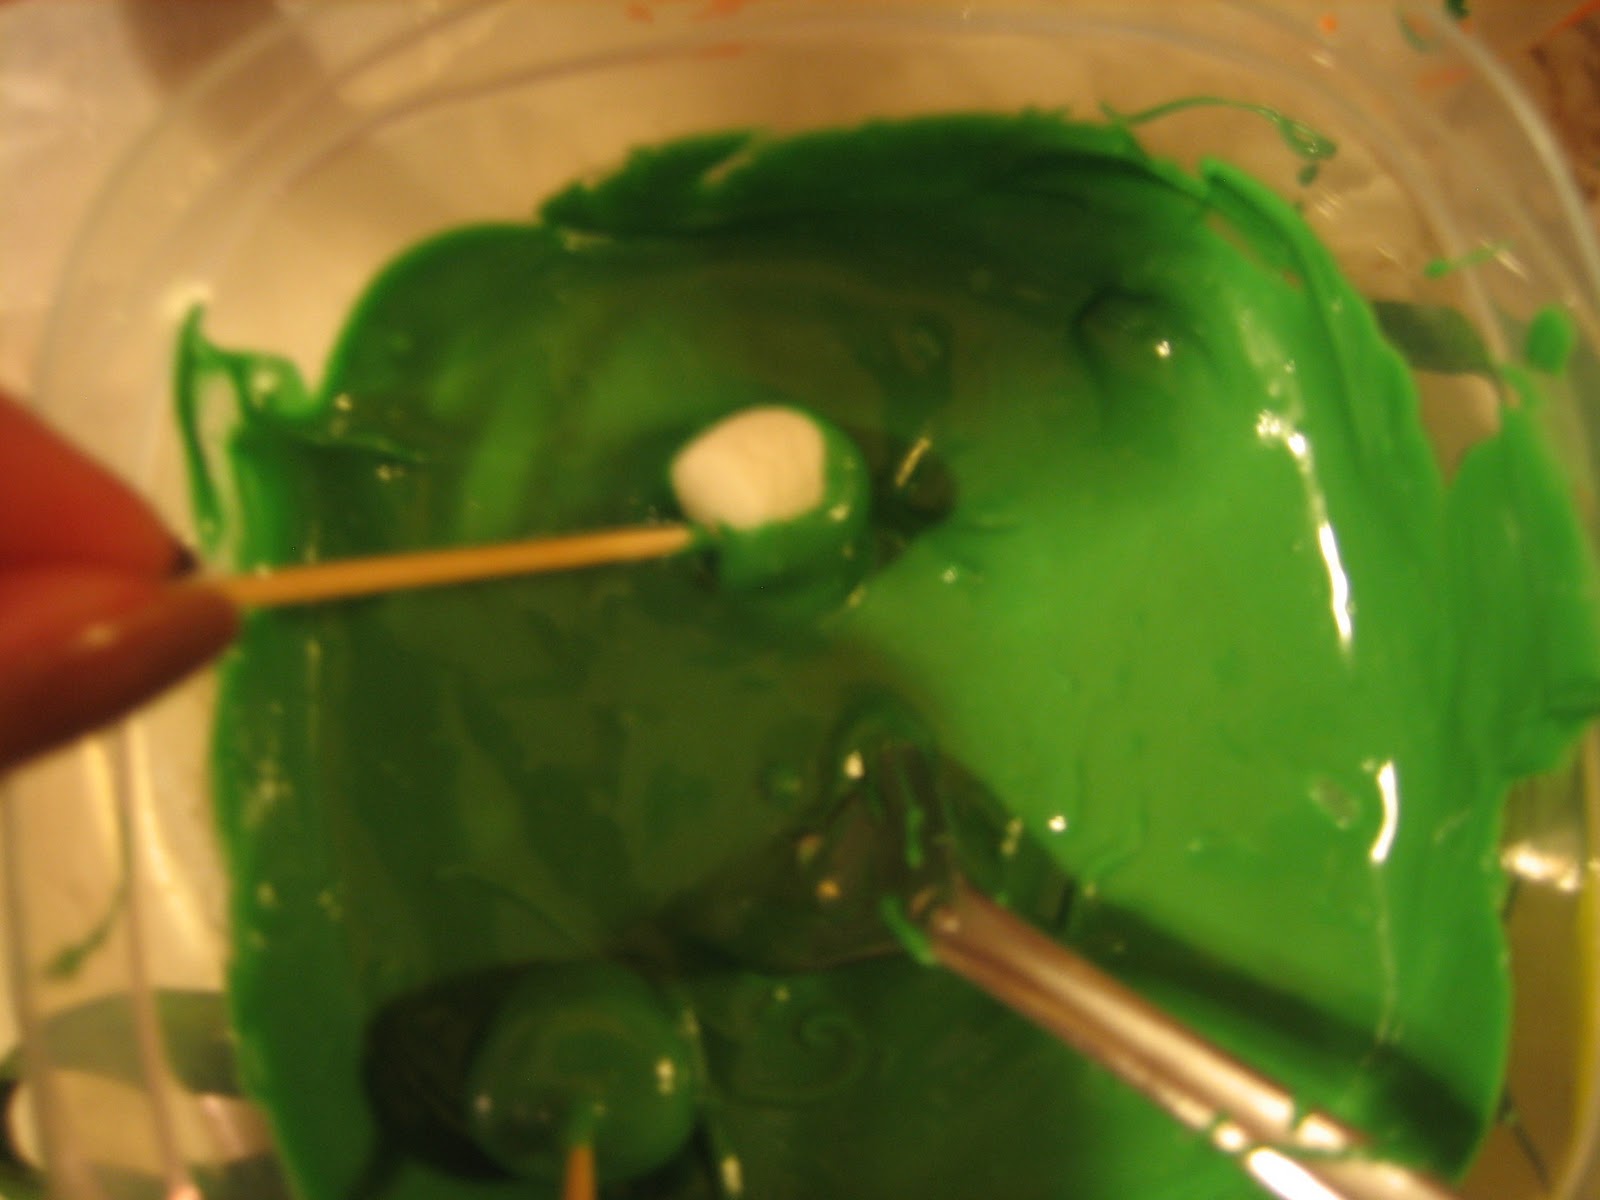
Once they dried I was able to do my second step that was adding the stem on top. Which was a tiny marshallow that was dipped in green chocolate by using toothpicks to dip and place them on top.

This project does take time and patience, but they do come out cute. In the back ground you can see ones I just drizzled with chocolate. I like to try different types when I am experimenting. Now all I have to do is wrap them up and give them out.
The last baking item of the night was my famous cake brownies. I like to make these when I am going to a potluck or school event. The reason for this is they are fast and easy, plus they taste so good.
This is what you will need to make them: One box of chocolate cake mix, one 4oz box of instant chocolate pudding, 2 cups of milk and a bag of chocolate chips.

First mix together instant pudding and milk only to dissolve the mix not to make it pudding like. Second add in the cake mix. Mix until everything is smooth and then fold in the chocolate chips. Here's the tricky part place on a cookie sheet that is 13x9. I like to place wax paper down first and spray it with cooking spray to help smooth out the mixture. It may not look like enough but it is. Believe me you just have to work on spreading it with a spatula. Because once they start cooking they will rise and spread like a cake. They should look this before they are placed in the oven at 350 for 20-25 minutes.

Once they are finish baking let them cool for about 15 minutes before cutting. I also like to add a special touch by adding drizzled melted dark chocolate and white chocolate to give it an extra sweet bite. This recipe makes about 40 brownies. Here is what they look like when they are done.

I will follow up next this coming week with a gift idea for your teacher for November. Until then try out some of these goodies.


0 comments:
Post a Comment