June 24, 2012

Anna Banana Spice Cupcakes

The next recipe in the "Summer Series" is inspired by an upcoming party that I will be baking for.


Ingredients

1 - box of spice cake mix
3 - medium ripe bananas
1 - cup of toasted chopped walnuts

Frosting

1 - tub of whip cream
1- 5 oz box of banana instant pudding 
Banana chips 
Caramel sauce 

Pre-heat oven to 350

Line two cupcake pans with cupcake liners.

After following directions on cake box add the bananas cut up in square pieces to the mix and toasted  chopped walnuts.

( If you have the question on how to toast walnuts.  layer walnuts on a cookie sheet and place in boiler, making sure to toss with fork around until lightly brown.  Don't leave in to long or they will burn.)

Using a 1/3 cup measure fill liners with the batter.

Place in oven for 18-24 mins depending how long your oven cooks or until you can insert a toothpick clean.

Will the cupcakes are in the oven put together frosting.

You want to make sure that your tub of whip cream is completely thawed out before mixing together with the instant banana pudding packet.

I normally use a 4 oz packet of pudding for any frosting, but they only come in 5 1/2 oz packages for banana flavor.  Pour only about half the pudding into the whip cream and mix together.  You can use your beater but I suggest on the lowest speed.  The whip cream and pudding will become thick so don't get worried.  Set aside in the fridge until cupcakes are ready.

After you have let the cupcakes completely cooled.  Place frosting in a piping bag or ziploc bag using a large tip.  I used a Ateco 866 tip for mine.  Squeeze in the center a bit of frosting, you do not have to cover the whole cupcake for this and place a banana chip on top, add a drizzle of caramel and your done.

***Please note I was able to make 30 cupcakes with this recipe and the frosting only covers 24.
If you like more frosting just double the recipe when you make it.***

Keep in fridge if not serving right away.


 Happy baking,
RC


June 20, 2012

Fruit Croissant Bake

"Summer Easy Recipe Series"

This is one easy recipe with a few ingredients I think you will enjoy for breakfast or as a snack.


Ingredients

1- 8oz pkg of cream cheese (soften)
1 - can of refrigerated croissants
1 - cup of fresh strawberries
1 - cup of frozen blueberries
sugar

Pre-heat oven to 375

On a non-stick cookie sheet layer croissants slightly one on top of the other with the point part facing down.

Wash and cut strawberries in small pieces, add blueberries and mix with 2 table spoons of sugar.

In a medium bowl blend together with a fork soften cream cheese and 1/3 cup sugar until smooth.

Spread cream cheese mixture down the middle of croissants and top with fruit.

Crisscross dough over top of fruit and sprinkle with sugar.

Place in oven for 15-20 minutes or until golden brown.

Let it cool off before serving.

Thanks for stopping by today & let me know how it turned out if you try it.


I am happy to announce that "The Sweet and Simple Sisters" is now on facebook.
Please click the link below to like and tell a friend!

Thanks,
RC


June 01, 2012

Graduation Party

The last few weeks have been a busy one my friends.  
But I have time to post now so I am not complaining. 
I just finished up with my niece's college graduation party that came out fantastic. 
I made pom poms to hang from the patio, graduation hat inserts for the flowers, a candy bar and 100 cookies. 
 I was thankful I did not have to do all the work. 
Here's a peek of the pictures from the party.  
The only regret was I wasn't able to get more pictures for this post.  


Please note this beautiful sign was made by a good friend who is very talented.


Over the next few weeks I will be working on some great projects and ideas for 4th of July, a 50th birthday party, kids party ideas and even adding a weekly post on experiments of summer cooking with the kids.  
I even want to start a linking up party on Thursday's for summer recipe ideas on new simple meals or a blast from the past with a twist.  

Please leave a comment and let me know if your interested in the Thursday recipe party!  Have a great week. 

May 21, 2012

Inspiration Candle Holder

I was inspired this Mother's day to make something special for the ones I love by a gift I received from my daughters teacher. 
 It was a beautiful candle holder out of a mason jar.


Supplies

Clear plain mason jars - (Walmart 12 dozen for around $6.00)
Painter pins - (Walmart for $1.98)
Jewels for bling
Rope twine - (that can be purchase at a craft or fabric store)
Sand or rocks (Walmart in candle section non-flammable only)
single candles
Glue gun for assembling

Before starting I rinsed and wiped down each mason jar.


With glue gun very carefully wrap rope around the rim of the jar until you run out of space.


Once done set aside so you can work on the flower part.
Below are pictures on how to assemble a flower with the rope by looping it together and using the glue gun each time to keep it in place.  Be sure to not to press hard to avoid burning your fingers.


Once glued together, place a rhinestone jewel in middle.
Now attach to the top of the jar with a little glue.

The next part was a little tricky. 
Due to the fact that you are writing on the glass and the paint is wet.
Hold jar by the bottom or top of the rim for best results and go in a circular motion when writing. 
It's okay if you smug the letters because they can be wiped off if you act fast.
As soon as the paint is dry add sand or rock and place candle in middle. 


If you are wondering what is written on the jars. 
It was a special verse that was written for my sisters by me.

Sister,
You are a kind, compassionate, loving, wife, mother, friend and teacher.
Who is blessed by her gifts of mercy, grace and love.
You are a victorious, Proverbs 31 women with a heart of gold.  -RC


May 10, 2012

Teacher Gifts

I've been one busy mama this past week.  All due to "Teacher Appreciation Week". 
This is the only time of the year you can let your teacher know how special she or he is.
After looking at pinterest, I was inspired by the things I saw and decided to try out a few myself.

First up I wanted to surprise all the teachers in the school with a special door sign.

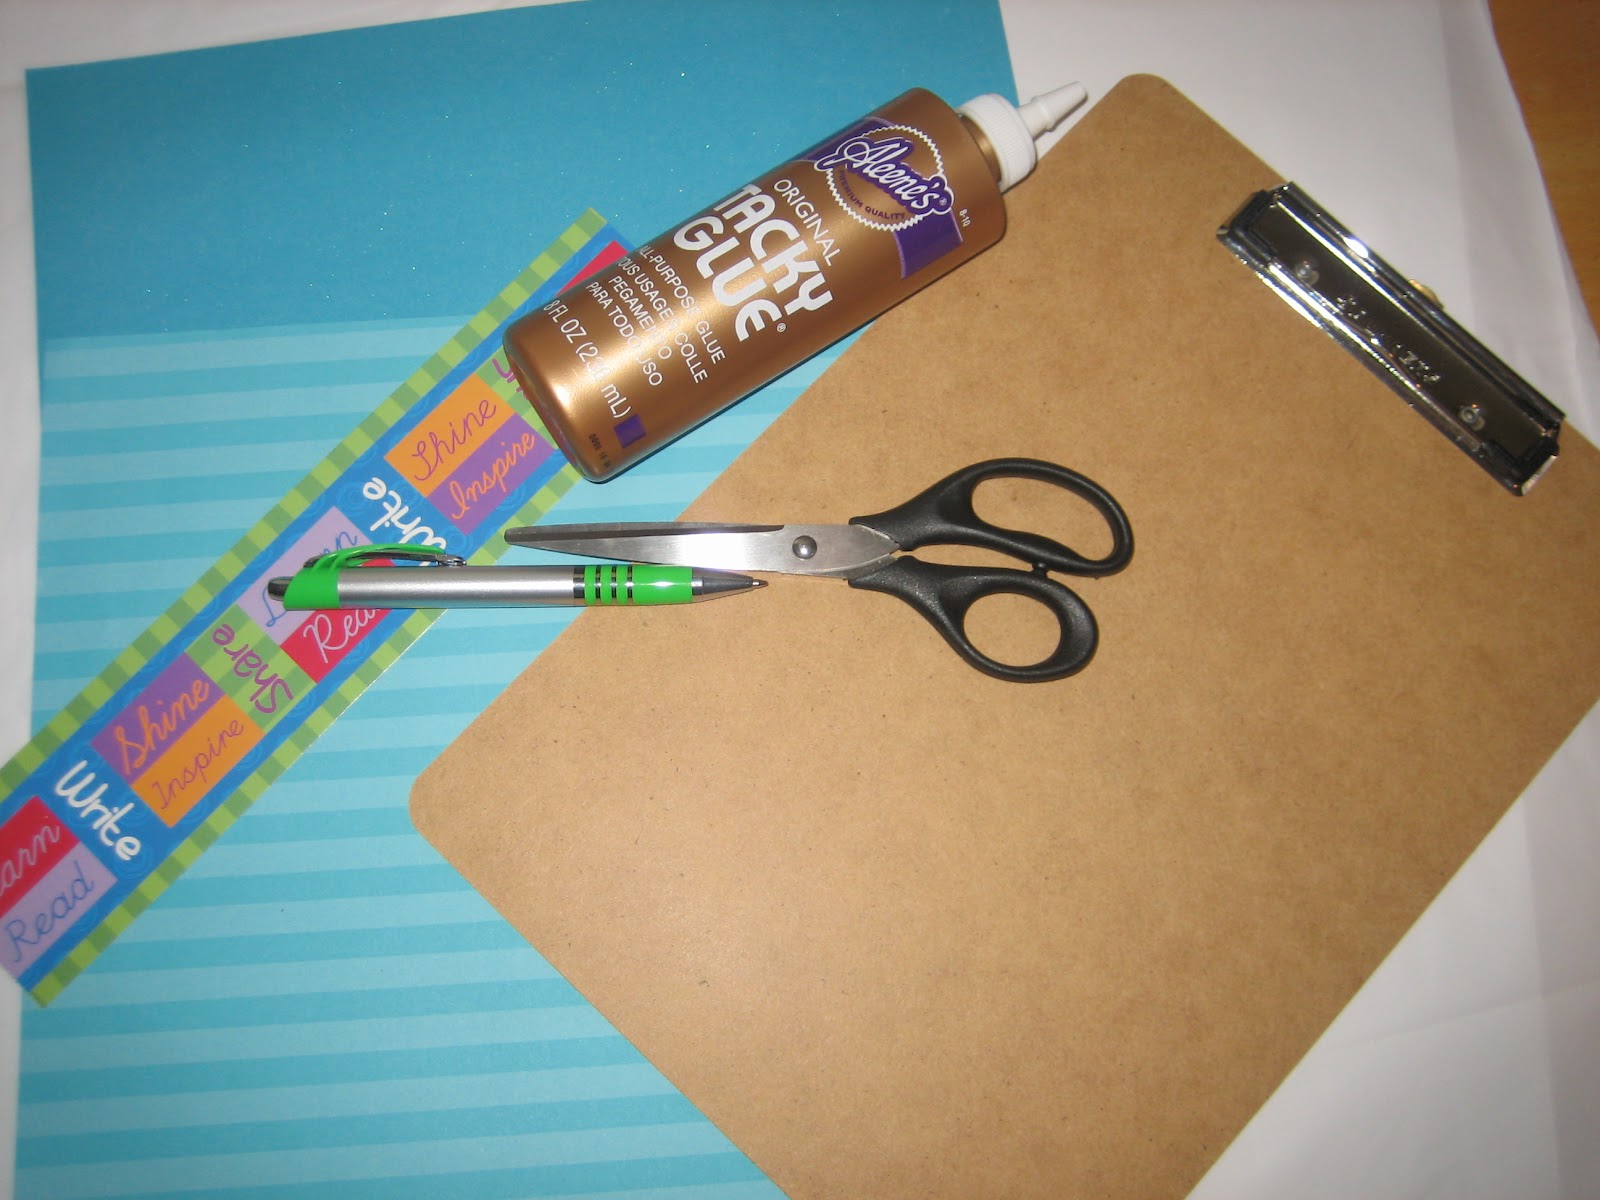
Only a few supplies needed for this easy no cost project as you can see below.


For my daughter's teacher and aide, I wanted to give a small token of appreciation each day.


This is just a few items that I sent and they where all under a buck. 
By using, ribbon, stickers, and scraping materials around the house for dressing up little things like post its, gum and paper clips saved me money.

The next items that I did were for the final gifts to teachers and staff at the school.

Dress up a clip board with scrape book materials, stickers, and bling. 
Whatever you could find will work. 
The pictures below take you step by step. 
 Just trace, cut, glue and add your personal touch. 
 I even added a clothes pin clip with ribbon to hold pens.


The next one is simple and no hassle. 
I purchased inexpensive colored picture frames at walmart and seashells.
All you need is a glue gun.


The last project did take some time to do, but I love the end result.
I like to call this one art bling!
You need a canvas, acrylic paint your choice of color, colored jewels, tacky glue and permanent paint pen.
The kids can get involved with this one. 
 I had my daughter do the painting.

Let paint dry and add a second coat if needed.
You want to make sure the canvas is completely dry before the next step.

With a paint pen trace the letter you want to use with a stencil. 
I printed a free one from the Internet.
Use a paint brush to put the glue on the canvas where you want the jewels to go.


Just us a paint pen to write the saying you want.
These only cost me $5.00 each to make.


You can use the same idea on a glass jar.

Thanks for stopping by today!


April 30, 2012

First Holy Communion Party


We recently celebrated my daughter's first holy communion.
My mission was to host a small get together for 20 on a budget.


The first on the list was invites.  I picked these cute invites up at target on clearance for $13.99. 
It always pays to shop around before ordering expensive ones.


I wanted to keep decorations to a minimum this time around.  I decided to make flower pom poms with white sparkle tissue paper I picked up at party city for $1.99.  I only used one package and pink curling ribbon for tying together.  I used tape to tack each flower on the back to the wall to shape the cross.

Sticking to the white and pink theme.  I found these cute pails at the dollar tree and flowers. 
They where in the wedding section and came with three buckets, thank you cards and ribbon. 
I picked up jewels, flowers and chocolate wrap candy for the inside.
I hot glued the white flowers around the rim half ways and made a cross out of jewels on the front.
I used pink tulle for the stuffer inside to hold up the candies and wrapped with clear baggies.

To help cut down on cost.  I made cupcakes instead of buying a fancy cake and shaped them into a cross adding a personal touch with candy pearls, flowers, and cross.


But we were given a nice surprise from my mom.  She made my little angel a cute doll cake. 
I also made brownie cake pops (which you can find on an older post on how to make easy and cheap.), dipped chocolate strawberries and stuff to make ice cream sundaes.


As for food I made it easy by making meat trays for sandwiches with chips and my family pitched in with making side dishes.  The day turn out to be one of the best get togethers with my family and friends.


April 07, 2012

DIY Felt Flower Hair Accessories & Pins

 I love do it yourself projects, but I like them to be easy without the extra fuss. 
As we know flower accessories are a hit with little ones. 
 Have you noticed the price tag on these hair clips and pins? 
That is why I decided to try my hand at making some.


Things you will need.  Bright colored felt, hair clips or pin backers, ribbon, jewels and stretchy headbands. 
Plus a glue gun or no sew glue. 
Just to let you know I was able to purchase alot of my supplies for under a $1.00 at places like walmart, dollor store and target.

I made a cardboard paper pattern out of flowers I had around the house.

I used the cardboard flowers for tracing.

In the middle I placed hot glue to attach the felt cut outs together.

On the hair clips I cut ribbon for the top part of the clip and glued on.


Final step glued a jewel in the middle and a clip on the back.


I wanted to show the backs so you can see what a pin or clip looks like on back.


Here are some of my DIY creations.


These cute flowers can dress up an outfit. 
 I added a felt flower pin to a dress I only paid $9.00 for and a headband to match for my little one.